Chai Cookie Sandwiches

Chai Cookie Sandwiches

INGREDIENTS

COOKIES

125g butter
175g light brown sugar
1 egg
2 tsp chai syrup (I use Henny & Joes – it’s amazing!)
300g plain flour
1 tsp bicarbonate of soda
1 tsp baking powder

GANACHE

100ml double cream
200g milk chocolate
1 tsp chai syrup (Henny & Joes)

METHOD

  1. Preheat oven to 170 degrees (fan) and line two baking trays
  2. Combine the milk chocolate, chai syrup and double cream for the ganache in a microwavable bowl, melt in the microwave on 30 second bursts, stirring well between each one until fully melted. Leave to cool, then pop in the fridge whilst you make the cookies
  3. Using an electric or stand mixer, beat the butter and sugar until pale, fluffy. Add the egg and chai syrup and beat again
  4. In a separate bowl combine the flour, baking powder and bicarb
  5. Add the flour mix into the wet ingredients and beat until just combined (don’t over work)
  6. Divide into 16 equal sized balls (20 if you want to make smaller cookies), divide between the two baking trays, gently using the back of a spoon flatten the cookie balls slightly before baking.
  7. Bake on the middle shelf for 15 mins,. Remove from the oven and cool on the tray for 10 minutes, then leave to cool completely on a wire rack.
  8. Remove the ganache from the fridge, (it should be thick and pipeable, if its too solid leave out to come to room temperature before piping), spoon into a piping bag and chop the end off.
  9. Take one cookie and pipe on to the flat side, a swirl of ganache, top with another cookie (flat side on to the ganache), repeat this process until they are all filled.

Enjoy!

ENJOY! If you opt for Chai Cookie Sandwiches, please do share a picture!


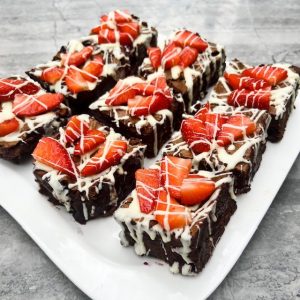
Jubilee Blueberry & Strawberry Double Chocolate Brownies

Jubilee Blueberry & Strawberry Double Chocolate Brownies

INGREDIENTS

200g dark chocolate
200g salted butter
275g caster sugar
250g blueberries
125g plain flour
3 large eggs
25g cocoa powder
50g dark chocolate chips
50g milk chocolate chips
50g white chocolate chips (melted & cooled)
5 strawberries, sliced and chopped into small pieces

METHOD

  1. Preheat oven to 170 degrees (fan) and line a 20 x 20cm baking tray tin with baking paper
  2. Combine the dark chocolate and butter, melt in the microwave on 30 second bursts, stirring well between each one until fully melted
  3. Using an electric whisk or stand mixer, whisk the eggs and sugar until pale, fluffy and around double in original size
  4. With the whisk still running slowly pour in the chocolate and butter mixture until it is fully combined
  5. Sieve in the flour and cocoa, and then fold together
  6. Fold in the blueberries, dark chocolate and milk chocolate chips, pour into the lined tray.
  7. Bake on the middle shelf for 25 mins or, if you prefer it more firm for 5 mins more. (I prefer them still a bit gooey in the middle!)
  8. Once done (they will still have a wobble), cool in the tin on a wire rack, drizzle over melted white chocolate and scatter the strawberries across the top
  9. Transfer to the fridge to firm up for 6 hours (preferably overnight)
  10. Remove from the tin, slice and serve

Enjoy!

ENJOY! If you opt for Blueberry & Strawberry Double Chocolate Brownies, please do share a picture!


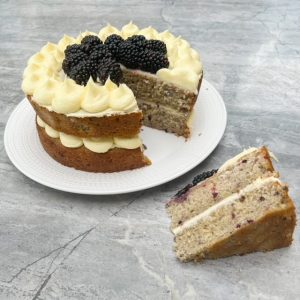
Jubilee Blackberry & White Chocolate Cake

Jubilee Blackberry & White Chocolate Cake

INGREDIENTS

BLACKBERRY CAKE
• 300g unsalted butter
• 300g caster sugar
• 100g fresh blackberries
• 5 large eggs
• 300g self-raising flour
• 1/2 tsp vanilla bean paste
• 50g Greek yoghurt (full fat)

 ICING
• 100g white chocolate melted and cooled
• 250g unsalted butter
• 350g icing sugar
• 1/2 tsp vanilla bean paste

 DECORATION
• 100g blackberries

METHOD

  1. Grease and line 2 x 20cm round springform cake tins and preheat the oven to 170 degrees fan.
  2. Beat together your unsalted butter and sugar until light and fluffy. Add in the eggs and beat until combined.
  3. Add the blackberries, vanilla bean paste and Greek yoghurt and beat again until fully combined and the blackberries have completely broken down
  4. Add flour, beat again until smooth.
  5. Divide equally between the two tins
  6. Bake both cakes on the middle shelf for 30-35 minutes or until a skewer comes out clean.
  7. Remove from oven, leave in the tin for 10 minutes then transfer to a wire rack to cool completely.
  8. To make the buttercream, beat the butter until pale and fluffy, then add the icing sugar, white chocolate and vanilla bean paste and beat again until soft and creamy.

To Assemble

  1. Start with one layer of the chocolate cake on to a cake board or plate, put a generous layer of buttercream across the top, then put another cake layer on
  2. Pipe or spread the remaining buttercream on to the top of the cake and decorate the centre with the remaining blackberries

ENJOY! If you opt for Blackberry & White Chocolate Cake, please do share a picture!


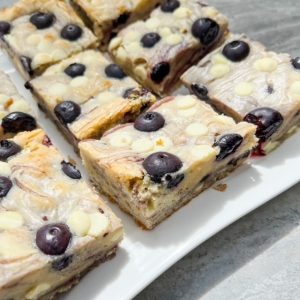
White Chocolate & Blueberry Blondies (GF)

White Chocolate & Blueberry Blondies (GF)

INGREDIENTS

  • 75g caster sugar
  • 175g light brown sugar
  • 3 large eggs
  • 200g salted butter
  • 200g white chocolate
  • 1/2 tsp vanilla bean paste
  • 280g GF plain flour
  • 1 tsp xanthum gum
  • 150g blueberry conserve
  • 50g blueberries
  • 50g white chocolate chips

METHOD

  1. Grease and line a 9inch square baking tin, pre heat the oven to 175 degrees fan
  2. Whisk the eggs and butter until pale, light and fluffy
  3. Combine the butter and white chocolate in a microwavable bowl and melt in 30 second bursts in the microwave
  4. Pour the melted white chocolate and butter slowly into the egg mixture, keep the whisk running continuously, add the vanilla bean paste.
  5. Add the GF flour and xanthum gum in a separate bowl and mix.
  6. Fold the flour into the batter gently until fully combined.
  7. Add the blueberry conserve and chocolate chips and lightly fold
  8. Pour into the baking tin and bake for 25 minutes, it will have a slight wobble
  9. Remove from oven, leave in the tin on a wire rack to cool completely. Once cool pop into the fridge for 6 hours, preferably overnight.
  10. Slice and enjoy!

ENJOY! If you opt for White Chocolate and Blueberry GF Blondies, please do share a picture!


Salted Caramel Cupcakes (GF)

Salted Caramel Cupcakes (GF)

INGREDIENTS

CUPCAKE

  • 200g salted butter
  • 275g light brown sugar
  • 3 tsp baking powder
  • 225g GF plain flour
  • 25g cocoa powder
  • 50g soured cream
  • 2 large eggs
  • 1/2 tsp vanilla bean paste
  • 100g caramel (I use carnation)
  • pinch of salt
  • 25g cocoa powder
  • 1 tsp xanthum gum
  • 50g condensed milk

ICING

  • 275g butter
  • 200g condensed milk
  • 200g icing sugar
  • 100g caramel
  • 1/2 tsp salt

METHOD

  1. Line a muffin tin with 12 deep cupcake cases and preheat the oven to 170 degrees fan.
  2. Beat together your salted butter and sugar until light and fluffy. Add in the eggs, beat until combined.
  3. Add the soured cream, vanilla bean paste, caramel, condensed milk and salt and beat until completely combined
  4. In a separate bowl mix together the GF flour, xanthum gum and cocoa powder
  5. Add the dry ingredients into the wet and beat again until just combined.
  6. Spoon equal amounts into each cupcake case and bake for 22-25 minutes or until a skewer comes out clean.
  7. Remove from oven, leave in the tin for 10 minutes then transfer to a wire rack to cool completely.
  8. To make the icing, combine the butter and icing sugar, beat until pale
  9. Add in the condensed milk, caramel and salt and beat again until thick and creamy in consistency, pop in the fridge for 10 minutes before piping
  10. Pipe onto the cooled cupcakes

ENJOY! If you opt for Salted Caramel Cupcakes (GF) Cupcakes, please do share a picture!


Ruby, Lime & Coconut Polenta Cupcakes (GF)

Ruby, Lime & Coconut Polenta Cupcakes (GF)

INGREDIENTS

CUPCAKE

  • 250g salted butter
  • 150g golden caster sugar
  • 100g light brown sugar
  • 100g ruby chocolate, melted and cooled
  • 100g polenta
  • 50g desiccated coconut
  • 1 tsp baking powder
  • 150g coconut flour
  • 4 large eggs
  • 1 lime, zest and juice
  • Pink food colouring (optional)

ICING

  • 250g full fat cream cheese
  • 250g mascarpone
  • 100g white chocolate, melted and cooled
  • 1/2 lime, juice and zest

METHOD

  1. Line a muffin tin with 12 deep cupcake cases and preheat the oven to 160 degrees fan.
  2. Beat together your salted butter and sugars until light and fluffy. Add in the eggs, beat until combined.
  3. Add the ruby chocolate and lime juice and zest and beat again until mixed thoroughly
  4. In a separate bowl mix together the polenta, desiccated coconut, coconut flour, baking powder
  5. Add the dry ingredients into the wet and beat again until just combined. If you are using it at this stage add a couple of drops of the pink food colouring and beat again until smooth
  6. Spoon equal amounts into each cupcake case and bake for 22-25 minutes or until a skewer comes out clean.
  7. Remove from oven, leave in the tin for 10 minutes then transfer to a wire rack to cool completely.
  8. To make the icing, combine the cream cheese, mascarpone, white chocolate and lime juice in a bowl and beat until thick, creamy and holds its shape, pop in the fridge for 10 minutes before piping
  9. Pipe onto the cooled cupcakes and top with the lime zest

Notes:

If you can’t find  ruby chocolate (I got mine from Tesco) just sub for white chocolate instead, it will give a slight different flavour but will be equally yummy!


ENJOY! If you opt for Ruby, Lime & Coconut Polenta Cupcakes, please do share a picture!


Rhubarb & Mango Savoury Muffins

Rhubarb & Mango Savoury Muffins

Makes 12

INGREDIENTS

• 235g plain flour
• 250g grated cheddar cheese
• 2 tsp baking powder
• 2 tsp caster sugar
• 1 tsp salt
• 1 tsp poppy seeds
• 90ml vegetable oil
• 120ml full fat milk
• 1 large egg
• 150g Rhubarb & Mango chutney (I used Annabel’s Deliciously British here)

Topping
• 85g grated cheese
• 1 tsp poppy seeds to sprinkle

METHOD

1. Heat the oven to 170 degrees fan and pop 12 muffin cases into a muffin tray
2. In a large bowl combine all the dry ingredients excluding the cheese and mix thoroughly, add the grated cheese and mix again
3. In a smaller bowl combine the oil, milk, egg and chutney and mix until all combined
4. Pour the wet ingredients into the dry and mix until just combined, do not overwork
5. Spoon evenly between the 12 muffin cases and top with the remaining cheese and poppy seeds
6. Bake on the middle shelf for 20-22mins (check a skewer comes out clean), then remove from the oven to a wire rack
7. These can either be served warm or cold. If not eating straight from being cooked then I highly recommend warming in the microwave for 3o seconds before serving – absolutely delicious!


ENJOY! If you opt for Rhubarb & Mango Savoury Muffins, please do share a picture!


Strawberry, Orange & Honey Tart

Strawberry, Orange & Honey Tart

Serves 12

INGREDIENTS

Chocolate Shortcrust Pastry
• 250g plain flour
• 30g cocoa powder
• 90g caster sugar
• Pinch of salt
• 140g unsalted butter, cold and cut into cubes
• 1 large egg
• 2 tbsp cold water

Tart Filling
• 100g white chocolate
• 200ml double cream
• 300g mascarpone
• 3 large eggs
• 3 tbsp Strawberry Blossom Honey (I use Annabels Deliciously British)
• Zest of 1 orange
• 150g Strawberries, chopped

To decorate
• 50g white chocolate, melted and cooled
• 1 tbsp strawberry blossom honey
• 6-8 strawberries, sliced

METHOD

Make the pastry
1. Heat the oven to 190 degrees fan and grease a 28cm loose bottom flan tin.
2. Using a food processor, combine all the dry ingredients and pulse. Add the butter and pulse again until it resembles breadcrumbs
3. Add the egg and water and pulse until a dough is formed. Tip out on to a floured surface and roll out to around 5mm thick.
4. Pop into the flan tin and trim the sides. Lay baking paper over the top and fill with either rice or baking beans.
5. Bake on the middle shelf for 30mins, then remove from the oven, take off the baking paper and rice/beans and pop back in the over for a further 8 minutes. (during this time make the filling). Once done, remove from the oven on to a wire rack ready to be filled.
6. Reduce the oven temperature to 170 degrees fan

Make the filling
1.Add the white chocolate and double cream into a large microwavable bowl and heat on 30 second bursts, stirring thoroughly between each one, until melted and combined to make a ganache.
2. Add the mascarpone. eggs, honey and orange zest and whisk until combined
3. Add the strawberries and stir through
4. Pour the filling into the chocolate pastry case and bake on the middle shelf for 25-30 mins, the edges will be cracked and there will still be a slight wobble in the middle
5. Remove from the oven and leave to cool for 10mins before removing from the flan tin to decorate.

Decorate
1. Lay the strawberry slices all around the edge of the tart
2. Drizzle over the honey and white chocolate, leave to fully cool then pop in the fridge for 2 hours to set.

Store in the fridge.

ENJOY! If you opt for Strawberry, Orange & Honey Tart, please do share a picture!


The Spring Edit 2022

The Spring Edit 2022

It’s been a while since I last did an edit on here, but Spring feels like the perfect time for a come back! It’s all clothes, accessories and shoes will be a separate edit to be released in the next few weeks. The main themes for this spring are bold colours (don’t be afraid of them, embrace them!), layering basic tees, cut outs and floral dresses. There is a lot here, so grab yourself a cuppa (or something a little stronger) and happy shopping!

For those of you that are new around here, the Edit is divided into 3 categories, High Street, Treat and Luxury.

Remember if you need any specific styling advice for any of the pieces below or are interested in my wider styling services do get in touch.

#AFF – Some of this edit contains Affiliate Links – all marked with a * next to the link

High Street

Heidi Textured Knit Cardigan | Caramel – Vita Grace

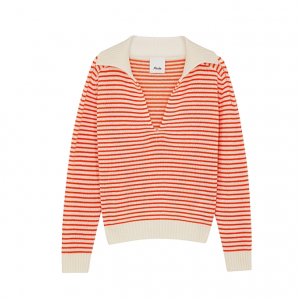
Two Tone Roll Neck Sweater | Flamingo & White – Vita Grace


Black Blanche Square Neck Top | WHISTLES | Whistles

Pale Pink Nicola Button Through Shirt | WHISTLES | Whistles

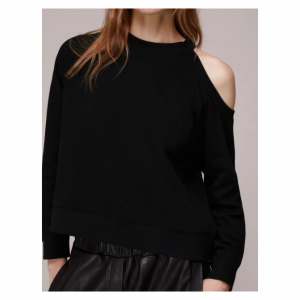
Black Cut Out Shoulder Sweat | WHISTLES | Whistles

https://www.stylink.it/lDmVAuwB7j *

Black Freya Bodysuit | WHISTLES | Whistles 

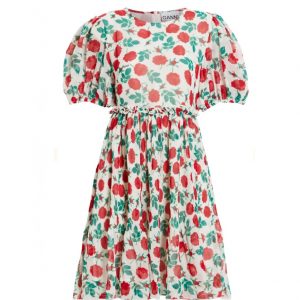
Ivory Paneled floral-print plissé-chiffon mini dress | Sale up to 70% off | THE OUTNET | GANNI | THE OUTNET

Light green Pleated crepe shorts | Sale up to 70% off | THE OUTNET | SAMSØE Φ SAMSØE | THE OUTNET

White Rosa Double Trim T-Shirt | WHISTLES | Whistles

Tomato red Gathered cotton-poplin mini dress | Sale up to 70% off | THE OUTNET | CLAUDIE PIERLOT | THE OUTNET

https://www.stylink.it/05YdPc4oMy *

White Shirred organic cotton-poplin shirt | Sale up to 70% off | THE OUTNET | GANNI | THE OUTNET

https://www.stylink.it/j4wQVCblL0 *

https://www.stylink.it/anwPVCjoRe *

https://www.stylink.it/45baLcQ6mJ *

https://www.stylink.it/3ZYmDc9Gp3 *

https://www.stylink.it/n73oVI9Xlb *

https://www.stylink.it/anwPVCj6BZ *

https://www.stylink.it/YQM2Vi0vGO *

https://www.stylink.it/n73oVI9Xlp *

https://www.stylink.it/AGbrBCo0j5 *

https://www.stylink.it/Jr4qXsNazY *

https://www.stylink.it/eXwLVSxgmm *

https://www.stylink.it/n73oVI9XZb *

hush Cotton Cali Slub V-Neck T-Shirt, Black at John Lewis & Partners

https://www.stylink.it/mndJVCpD61 *

https://www.stylink.it/j4wQVCblvL *

https://www.stylink.it/yPdBVuzdgb *

https://www.stylink.it/LY2MkCxv7A *

https://www.stylink.it/3ZYmDc9GVb *

https://www.stylink.it/rXd6VS4o7N *

https://www.stylink.it/AGbrBCo0VN *

https://www.stylink.it/Jr4qXsNaDo *

https://www.stylink.it/lDmVAuwoG9 *

https://www.stylink.it/6Zmvoc2qV9 *

https://www.stylink.it/q2dGVSAx23 *

https://www.stylink.it/ZQ7dViko3r *

https://www.stylink.it/j4wQVCblwL *

https://www.stylink.it/PMJNasQ1Bx *

https://www.stylink.it/45baLcQ6ar *

Treat

https://www.stylink.it/n73oVI9Xy5 *

Max Mara pink Tarsio T-Shirt | Harrods UK

Maje neutral Cotton-Linen Striped Shorts | Harrods UK

Reiss Frida Strappy Linen Maxi Dress – REISS

Reiss Lemon Etna Single Breasted Blazer – REISS

Reiss Etna Flared Tailored Trousers – REISS

Reiss Sabrina Double Strap Knitted Vest – REISS

Reiss Loren Flared Trousers – REISS

Reiss Pink Pembury High Waisted Tailored Shorts – REISS

Reiss Pembury Single Breasted Blazer – REISS

Reiss Laurie Square Neck Jersey Body – REISS

Reiss Febe High Rise Kick Flare Jeans – REISS

Reiss Brooke Flat Nappa Leather Sandals – REISS

SAINA – WHITE | Tops | Ted Baker UK

MMORRA – DK-BLUE | Tops | Ted Baker UK

FILATI – PL-BLUE | Knitwear | Ted Baker UK

IOLANA – PL-BLUE | | Ted Baker UK

TULIPI – DK-ORANGE | Dresses | Ted Baker UK

SAILA – NATURAL | Coats & Jackets | Ted Baker UK

Soft Tailored Popper Detail Wide Leg Jumpsuit | Karen Millen

Sparkle Tweed Military Blazer | Karen Millen

Compact Stretch Tailored Trouser | Karen Millen

Essential Tailored Slim Leg Trousers | Karen Millen

Batik Border Floral Drama Woven Maxi Dress | Karen Millen

Luxury

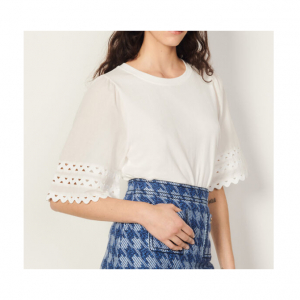
Lace trim T-shirt SFPTS01011 white – T-shirts | Sandro Paris (sandro-paris.com)

Totême white Signature Stripe Rollneck Sweater | Harrods UK

Stella McCartney blue Striped Cold-Shoulder Shirt | Harrods UK

Alessandra Rich pink Pearl-Trim Cable-Knit Cardigan | Harrods UK

Olivia Rubin multi Ombré Rainbow Aria Sweater | Harrods UK

Petar Petrov beige Adon Asymmetric Dress | Harrods UK

AGOLDE – Criss Cross straight-leg high-rise organic-cotton jeans | Selfridges.com

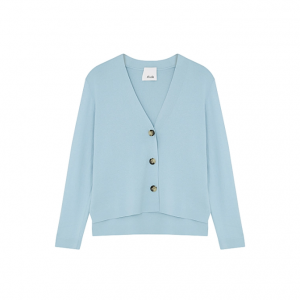
Allude Blue cotton and cashmere-blend cardigan – Harvey Nichols

Jil Sander Off-white straight-leg jeans – Harvey Nichols

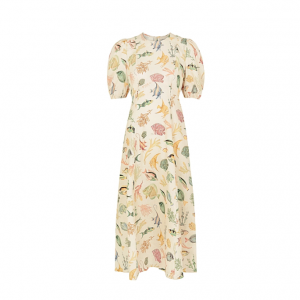
ALEMAIS Wanda ivory printed linen midi dress – Harvey Nichols

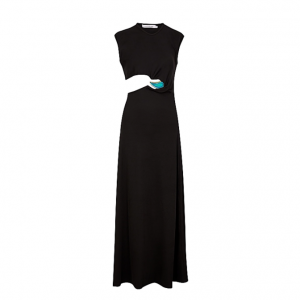
Christopher Esber Black mood stone stretch-jersey dress – Harvey Nichols

RIXO Gemma blue floral-print maxi dress – Harvey Nichols

Allude Striped wool and cashmere-blend jumper – Harvey Nichols

https://www.stylink.it/QPoOjuYglz *

The Wells Dress in Wallflower | STAUD | L.A. Style by Twiin – Twiin Store

The Beau Shirt in Lilac Pink | Xirena | L.A. Style by Twiin – Twiin Store

Husk Mangrove Midi Dress | Pasduchas | L.A. Style by Twiin – Twiin Store

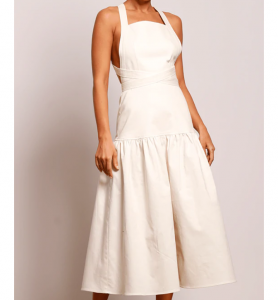
Ivory Sanctuary Midi Dress | Pasduchas | L.A. Style by Twiin – Twiin Store

Cream Rainbow Hampton Sweater | STAUD | L.A. Style by Twiin – Twiin Store

Sanctuary Shirt in Black | Pasduchas | L.A. Style by Twin – Twiin Store

Sanctuary Shorts in Black | Pasduchas | L.A. Style by Twiin – Twiin Store

Passage Dress in Sunbleached | STAUD | L.A. Style by Twiin – Twiin Store

The Rosewood Dress in White | ASTR | L.A. Style by Twiin – Twiin Store

Current Midi Dress in Black | Keepsake | L.A. Style by Twiin – Twiin Store

Abito Donna Jeans Dress – elalondon.com – E L A London


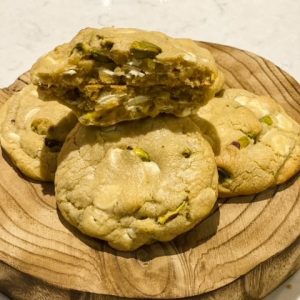
Pistachio & White Chocolate Cookies

Pistachio & White Chocolate Cookies

Makes 12

INGREDIENTS
• 325g plain flour
• ½ tsp bicarb of soda
• ½ tsp salt
• 1 tbsp cornflour
• 150g unsalted butter
• 100g light brown sugar
• 100g granulated sugar
• 1 large egg
• 200g white chocolate chips
• 125g shelled pistachios, chopped

METHOD
1. Grease two baking trays and preheat the oven to 175 degrees.
2. Using a stand or electric hand mixer beat together both sugars and butter until pale and fluffy.
3. Add the egg and beat again until thoroughly combined.
4. Add in the flour, bicarb, salt and cornflour and beat until fully combined but be careful not to overmix
5. Add the chopped pistachios and white chocolate chips, using a spatula or spoon stir through the cookie dough.
6. Divide in to 12 equal sized balls and put six on each tray.
7. Cook on your middle shelf for 12 minutes.
8. Remove from the oven and allow them to cool for 15-20 minutes on the tray before removing on to a wire rack to cool completely.

ENJOY! If you opt for Pistachio & White Chocolate Cookies, please do share a picture!


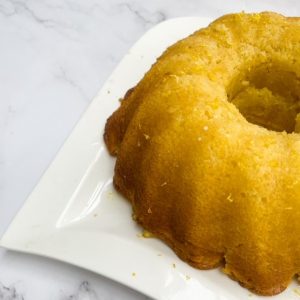
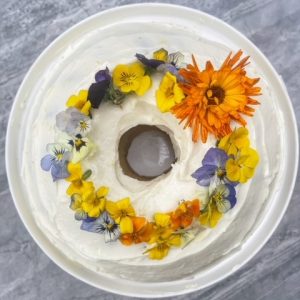
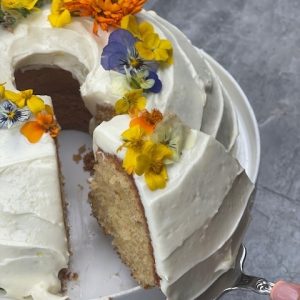
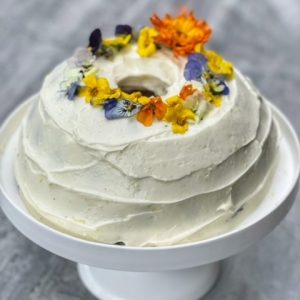
Lemon Drizzle Bundt Cake

Lemon Drizzle Bundt Cake

INGREDIENTS
CAKE
• 250g unsalted butter
• 250g caster sugar
• 4 large eggs
• 280g plain flour
• 1 tsp baking powder
• Juice of half a lemon
• Zest of 3 lemons
• 40g natural yoghurt

SYRUP
• Juice of 3 lemons
• 100g caster sugar

ICING DRIZZLE
• 60g icing sugar
• 3 tsp water

METHOD
1. Generously grease your Bundt tin and preheat the oven to 170 degrees fan.
2. Using a stand or electric hand mixer beat together sugar, butter, lemon juice and lemon zest until pale and fluffy.
3. Add each egg at a time beating well between each one. Then add the natural yoghurt and beat again.
4. Add the flour and baking powder, beat until just combined but do not overwork
5. Bake the cake on the middle shelf for 45-50 minutes or until a skewer comes out clean.
6. Whilst the cake is cooking make the syrup, heat the sugar and lemon juice in a pan and allow to gently simmer for 3-4 minutes until reduced by about half, then transfer to a bowl to cool completely
7. Remove from cake from the oven, leave in the tin for 10 minutes
8. Using a wooden pick or skewer poke holes all across the cake (whilst still in the tin and is still warm) and pour over the cool syrup.
9. Leave to cool for another 15 minutes in the tin, then turn out on to a wire rack to cool completely.
10. Combine the icing sugar and water in a small bowl and drizzle over the top of the cooled cake.

ENJOY! If you opt for Lemon Drizzle Bundt Cake, please do share a picture!


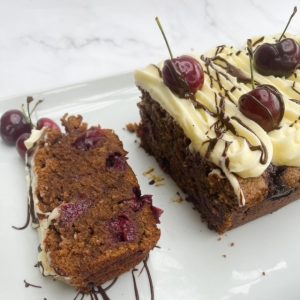
Chocolate & Cherry Loaf Cake

Chocolate & Cherry Loaf Cake

INGREDIENTS
LOAF CAKE
• 240g fresh cherries, stoned, halved, and tossed in a little plain flour
• 200g unsalted butter
• 100g light brown sugar
• 100g caster sugar
• 3 large eggs
• 150g plain flour
• 80g ground almonds
• 1 tsp vanilla extract
• 75g milk chocolate, melted
• 1 tsp baking powder
• 50g natural yoghurt

ICING
• 200g butter
• 400g icing sugar
• Couple of drops of cherry essence
• 1 tsp milk

OPTIONAL DECORATION
• 6 fresh cherries
• 50g milk chocolate, melted

METHOD
1. Grease and line a loaf tin and preheat the oven to 170 degrees.
2. Using a stand or electric hand mixer beat together both sugars and butter until pale and fluffy.
3. Add the eggs, vanilla extract, melted milk chocolate and natural yoghurt and beat again until thoroughly combined.
4. Add in the flour, ground almonds and baking powder and beat again until fully combined.
5. Add the chopped cherries and using a spatula or spoon stir through the cake batter
6. Pour into your lined tin and bake on your middle shelf for 50-60 minutes or until a skewer comes out clean
7. Remove from the oven and allow to cool for 10 minutes in the tin before turning out on to a wire rack to cool completely.
To make the cherry buttercream:
8. Beat the butter until pale and creamy. Add in the icing sugar and beat again until soft.
9. Add the cherry essence and milk and beat again until you have a spreadable creamy consistency.
10. Either pipe or spread across the cooled cake, decorate with a drizzle of the melted milk chocolate and fresh cherries (optional)

ENJOY! If you opt for Chocolate & Cherry Loaf Cake, please do share a picture!


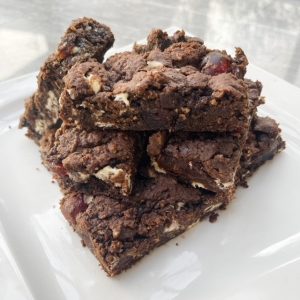
Double Chocolate, Cherry and Oat Cookie Cake Bars

Double Chocolate, Cherry and Oat Cookie Cake Bars

INGREDIENTS

• 125g salted butter
• 100g light brown sugar
• 100g golden granulated sugar
• 200g plain flour
• 1 tbsp natural yoghurt
• 50g cocoa powder
• 1 tsp bicarbonate of soda
• 50g jumbo porridge oats
• 1 large egg
• 250g glace cherries
• 100g white chocolate chips

METHOD

1. Grease and line a 9×9 inch tin and preheat the oven to 175 degrees.
2. Using a stand or electric hand mixer beat together both sugars and butter until pale and fluffy.
3. Add the egg and natural yoghurt and beat again until thoroughly combined.
4. Add in the flour, cocoa powder, oats and bicarbonate of soda, beat again until fully combined.
5. Add the glace cherries and white chocolate chips and fold through
6. Pour into your lined tin and bake on your middle shelf for 18-20 minutes
7. Allow to cool completely in the tin before turning out.


ENJOY! If you opt for Double Chocolate, Cherry and Oat Cookie Cake Bars, please do share a picture!


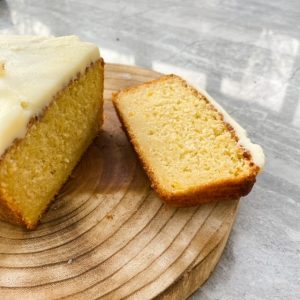
Mango Loaf cake

Mango Loaf cake

INGREDIENTS

INGREDIENTS
LOAF CAKE
• 250g salted butter
• 250g golden caster sugar
• 1 tin of mango slices in syrup, separated into the pieces (chopped) and syrup
• 275g self-raising flour
• 5 large eggs

ICING
• 125g butter
• 250g icing sugar

METHOD
1. Grease and line a loaf tin and preheat the oven to 170 degrees.
2. Using a stand or electric hand mixer beat together sugar and butter until pale and fluffy.
3. Add the eggs and beat again until thoroughly combined.
4. Add in the flour and chopped mango, beat again until fully combined.
5. Pour into your lined tin and bake on your middle shelf for 55-60 minutes or until a skewer comes out clean
6. Remove from the oven, using a skewer prick holes all over the top of the loaf cake and spoon 5 tbsp of the reserved syrup over the top
7. Allow to cool in the tin for 10 minutes in the tin before turning out on to a wire rack to cool completely.
To make the mango buttercream:
8. Beat the butter until pale and creamy. Add in the icing sugar and beat again until soft.
9. Add 2 tbsp of the reserved mango syrup and beat again until you have a spreadable creamy consistency.
10. Either pipe or spread across the cooled cake

ENJOY! If you opt for Mango Loaf cake, please do share a picture!


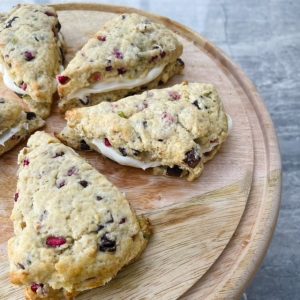
Pomegranate, Pistachio & Dark Chocolate Scones

Pomegranate, Pistachio & Dark Chocolate Scones

INGREDIENTS

SCONE
• 275g plain flour
• 50g granulated sugar
• 1tsp baking powder
• 85g salted butter, cold and cubed
• 100g dark chocolate chips
• 100g pomegranate seeds
• 50g chopped pistachios
• 150ml soured cream
• 1 large egg
• 1 tsp vanilla extract
• 1 tbsp milk

FILLING
• 150g mascarpone
• 100g full fat cream cheese
• 1 tbsp icing sugar
• ½ tsp vanilla extract


METHOD

1. Heat oven (fan) to 215 degrees and line a baking tray.
2. Using a food processor or fingertips pulse together flour, sugar, baking powder and butter until you have small crumbs.
3. Decant into a large bowl and stir through chocolate chips and pomegranate seeds. Make a well in the centre.
4. In a separate bowl, whisk together the sour cream, egg, and vanilla. Add to the flour mixture, using a fork gently stir, try not to over mix. Bring to a dough ball.
5. Flour your work surface and shape into around 1 inch thick, cut into 8 wedges, separate and put them on your baking tray.
6. Brush with milk and bake for 10-12 mins until golden brown. Once cooked, cool on a wire rack.
7. Whilst cooling, make the filling. Whisk mascarpone, Philadelphia, icing sugar and vanilla extract together in one bowl.
8. Cut the cooled scones in half and spread a generous layer of filling, place the scones back together.


ENJOY! If you opt for Pomegranate, Pistachio & Dark Chocolate Scones, please do share a picture!


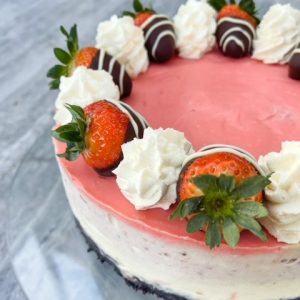
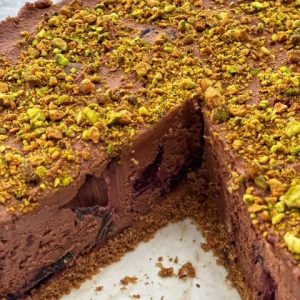
Strawberry & Chocolate Cheesecake

Strawberry & Chocolate Cheesecake

INGREDIENTS

CHEESECAKE
• 308g Oreos
• 75g unsalted butter, melted
• 500g mascarpone
• 340g full fat cream cheese
• 300ml double cream
• 200g white chocolate
• 4 tbsp strawberry jam

GANACHE
• Red food colouring
• 50ml double cream
• 150g white chocolate

FOR DECORATION
• 8 strawberries
• 100ml whipped cream
• 75g dark chocolate
• 25g white chocolate


METHOD

1. Crush the Oreos with a hand blender until completely ground. Add melted butter and combine with a spoon
2. Grease and line the base of a 20cm round, deep, loose bottomed cake tin. Add the biscuit mixture to the cake tin and pat it flat with the back of a spoon. Leave to set in the fridge for about 30 mins.
3. Melt the chocolate in a heat proof glass bowl over a small pan of hot water on a low heat. Stir occasionally to prevent sticking and just before it is fully melted add the preserve and stir through.
4. Remove from the heat and leave to cool for 10 mins until barely warm but still a liquid consistency.
5. Meanwhile whisk the cream cheese and mascarpone together. Add double cream and keep whisking until the mixture is fully holding its own shape. Finally add the melted chocolate and strawberry jam and whisk until combined.
6. Spoon the mixture over the cooled and set biscuit base, then smooth the top. Return to the fridge to cool whilst you prepare the ganache
7. To make the ganache put the food colouring, double cream and white chocolate into a microwavable bowl and heat at 15 second intervals stirring well after each one, until you have a smooth, glossy, pourable mixture.
8. Remove the cheesecake from the fridge, pour over the ganache and return to the fridge.
9. For the decoration, melt both chocolates in separate bowls in the microwave on 30 second intervals, when fully melted, dip the strawberries in the dark chocolate and pop on to a lined baking tray. Using a spoon drizzle, the white chocolate in lines. Once these are set enough to handle put on to the cheesecake leaving a little room between each one.
10. Beat the whipping cream until soft peaks are formed then either pipe or spoon between each strawberry.
.


ENJOY! If you opt for Strawberry & Chocolate Cheesecake, please do share a picture!


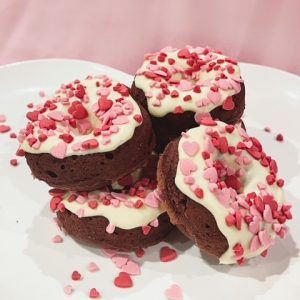
Ricotta Baked Donuts

Ricotta Baked Donuts

INGREDIENTS

DONUT
• 75g Ricotta
• 60ml milk
• 1 egg
• 36g butter, melted
• 1 tsp vanilla
• 125g self-raising flour
• 10g cocoa powder
• ½ tsp bicarbonate of soda
• 1 tbsp cornflour
• 70g light brown sugar
• Red food colouring

FOR DECORATION
• 100g melted white chocolate
• Sprinkles of your choice


METHOD

1. Line a 6-hole donut silicon mould and preheat the oven to 175 degrees fan.
2. In a medium-sized mixing bowl, beat together the butter, ricotta, milk, and sugar until smooth.
3. Add the egg, vanilla essence and food colouring and beat again to thoroughly combine.
4. In a separate bowl mix together the cornflour, bicarbonate of soda, flour, and cocoa powder.
5. Add the flour mixture to the bowl containing the wet ingredients and mix until fully combined
6. Spoon equal amounts into each donut hole and bake for 11-13 minutes (until a skewer comes out clean).
7. Remove from oven, leave in the mould for 10 minutes then transfer to a wire rack to cool completely.
8. To decorate, once cool spoon over the melted chocolate and cover in sprinkles.


ENJOY! If you opt for Ricotta Baked Donuts, please do share a picture!


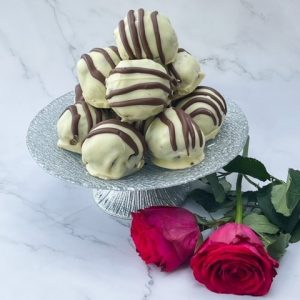
Red Velvet Cake Truffles

Red Velvet Cake Truffles

INGREDIENTS

• 200g self-raising flour
• 50g cocoa powder
• 250g unsalted butter
• 250g light brown sugar
• 5 large eggs
• 1 tsp vanilla essence
• 200g full fat cream cheese
• 100ml double cream
• Red food colouring
• 350g white chocolate
• 100g milk chocolate

METHOD

1. Grease and line 1 x 6inch round springform cake tin and preheat the oven to 170 degrees fan.
2. First make the red velvet chocolate cake. Beat together your unsalted butter and sugar until light and fluffy. Add in the eggs, vanilla essence and red food colouring and beat until combined.
3. Add flour and cocoa powder, beat again until smooth.
4. Bake both cakes on the middle shelf for 35-40 minutes or until a skewer comes out clean.
5. Once removed from the oven, leave to cool in the tin for 10 minutes, then remove and cool completely on a wire rack.
6. Add the cream cheese and double cream to a bowl and beat until firm.
7. Once the cake is fully cooled add into the cream cheese/cream mixture and then beat until fully combined (either using a stand mixer or electric hand beater)
8. Shape the mixture into balls shapes and put on to a lined large baking tray (spread across two small if preferred) and put in the fridge for 15 minutes.
9. Melt the two types of chocolate in separate bowls.
10. Remove the cake truffles from the fridge, dip each one in turn (using a fork or skewer makes this easier) into the white chocolate and then return to the baking tray.
11. When all are covered, using a spoon drizzle the milk chocolate over the top, then return to the fridge to set.


ENJOY! If you opt for Red Velvet Cake Truffles, please do share a picture!


Coffee & Cardamom Cream Cupcakes

Coffee & Cardamom Cream Cupcakes

INGREDIENTS

CUPCAKE

  • 200g unsalted butter
  • 200g caster sugar
  • 4 large eggs
  • 200g self-raising flour
  • 1 tbsp boiled water mixed with 2 tsp of instant coffee

ICING

  • 250ml double cream
  • 100g icing sugar
  • 360g Philadelphia cream cheese
  • 1 tsp cardamom essence

METHOD

  1. Line a muffin tin with 12 deep cupcake cases and preheat the oven to 180 degrees fan.
  2. Beat together your unsalted butter and sugars until light and fluffy. Add in the eggs, beat until combined.
  3. Add flour and coffee and beat again until smooth.
  4. Spoon equal amounts into each cupcake case and bake for 15-18 minutes.
  5. Remove from oven, leave in the tin for 10 minutes then transfer to a wire rack to cool completely.
  6. To make the cardamom cream, combine the double cream, Philadelphia, icing sugar and cardamom essence in a bowl and beat until thick, creamy and holds its shape
  7. Pipe onto the cooled cupcakes


ENJOY! If you opt for Coffee & Cardamom Cream Cupcakes, please do share a picture!


The Ultimate VEGAN Lemon Cake

The Ultimate VEGAN Lemon Cake

INGREDIENTS

CAKE
• 400g caster sugar
• 350ml soya milk
• 120ml vegetable oil
• 1tsp vanilla extract
• 400g self raising flour
• 1.5 tsp baking powder
• 1 tbsp apple cider vinegar
• 2 lemons, juice and zest

VEGAN BUTTER ICING
• 250g vegan butter block (like stork)
• 500g icing sugar
• 1 lemon, juice and zest
• 2 tsp soya milk

OPTIONAL DECORATIONS:
• 100g vegan lemon spread
• 20g Vegan dark chocolate

METHOD

  1. Grease and line 2 x 8inch round springform cake tins and preheat the oven to 180 degrees fan.
  2. Put the flour, sugar and baking powder into a large bowl and mix thoroughly with a spoon.
  3. Add the soya milk, apple cider vinegar, vegetable oil, vanilla extract, lemon juice and lemon zest
  4. Whisk (I used an electric hand whisk) very briefly, you don’t want to overmix, it’s just so they are combined and small lumps remaining are fine.
  5. Divide the mixture between the two lined cake tins
  6. Bake both cakes on the middle shelf for 30 minutes or until a skewer comes out clean.
  7. Remove from oven, leave in the tin for 10 minutes then transfer to a wire rack to cool completely.
  8. To make the buttercream, beat the vegan butter until soft, then add the icing sugar, lemon juice, zest and soya milk and beat again until soft and creamy.

To Assemble

  1. Pop a layer of your vegan lemon spread on to the top of one of your cakes. Then spread or pipe a generous layer of lemon buttercream on top of this.
  2. Lay the second cake layer on the top of this and spread or pipe the remaining buttercream on top.
  3. Grate the vegan dark chocolate over the top and enjoy!

Store in an airtight container.

ENJOY! If you opt for The Ultimate Vegan Lemon Cake, please do share a picture!


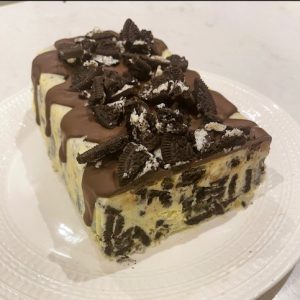
No Bake White Chocolate Oreo Fridge Cake

No Bake White Chocolate Oreo Fridge Cake

INGREDIENTS

• 170g unsalted butter
• 400g white chocolate
• 397g condensed milk (1 can)
• 2 pack of Oreo biscuits, crushed
• 100g dark chocolate (or milk)
• 1 tsp vegetable oil
• 4 Oreo Biscuits, crushed

METHOD
1. Line a loaf tin with baking paper. I use these from Amazon Loaf Tin Liners
2. Break the biscuits up into a bowl, just do this with your hands as you want the pieces to be quite chunky!
3. Put the chocolate and butter in a bowl and microwave for 30 second bursts until melted and smooth. Stir really well between each one, it will take roughly 1 min 30 in total.
4. Pour in the condensed milk and stir to combine
5. Add the crushed biscuits and then gently mix
6.Pour into the loaf tin, press down and level off as best as you can. Pop in the fridge for 2-3 hours until just set.
7. Once set, turn out on to a plate.
8. To decorate, melt the dark chocolate and vegetable oil in a bowl, in the microwave on 30 second bursts stirring after each one. Spoon over the top of the cake and encourage it to drip down the sides. 9. 9. Sprinkle the remaining 4 crushed Oreo biscuits over the top, pop back in the fridge for a further 30 minutes to set.
10. Remove from fridge for serving and serve in slices. Keep it stored in the fridge.


ENJOY! If you opt for No Bake Biscoff Fridge Cake, please do share a picture!


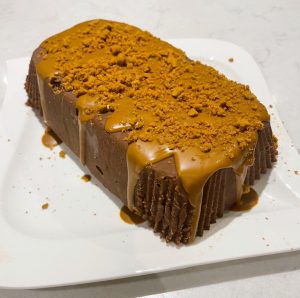
No Bake Biscoff Fridge Cake

No Bake Biscoff Fridge Cake

INGREDIENTS

• 170g unsalted butter
• 400g milk chocolate
• 397g condensed milk (1 can)
• 1 pack of Lotus Biscoff biscuits, crushed
• 3 tbsp Biscoff spread
• 2 Lotus Biscuits, crushed

METHOD
1. Line a loaf tin with baking paper. I use these from Amazon Loaf Tin Liners
2. Break the biscuits up into a bowl, just do this with your hands as you want the pieces to be quite chunky!
3. Put the chocolate and butter in a bowl and microwave for 30 second bursts until melted and smooth. Stir really well between each one, it will take roughly 1 min 30 in total.
4. Pour in the condensed milk and stir to combine
5. Add the crushed biscuits and then gently mix
6.Pour into the loaf tin, press down and level off as best as you can. Pop in the fridge for 2-3 hours until just set.
7. Once set, turn out on to a plate.
8. To decorate, melt the Biscoff Spread in a bowl, in the microwave, this will only for 30 seconds. Spoon over the top of the cake and encourage it to drip down the sides. 9. 9. Sprinkle the remaining 2 crushed Biscoff biscuits over the top, pop back in the fridge for a further 30 minutes to set.
10. Remove from fridge for serving and serve in slices. Keep it stored in the fridge.


ENJOY! If you opt for No Bake Biscoff Fridge Cake, please do share a picture!


Pina Colada Cupcakes

Pina Colada Cupcakes

INGREDIENTS

CUPCAKE
• 200g unsalted butter
• 100g light brown sugar
• 100g caster sugar
• 3 large eggs
• 2 tbsp of coconut cream
• 50g desiccated coconut
• 3 pineapple rings cut into small pieces and dusted in a little plain flour
• 200g self-raising flour
• 2 tsp baking powder

ICING
• 250g unsalted butter
• 450g icing sugar
• 2 tbsp coconut cream
• 1 tbsp white rum (optional)

DECORATION
• Glace cherries and pineapple chunks

METHOD
1. Line a muffin tin with 12 deep cupcake cases and preheat the oven to 175 degrees fan.
2. Beat together your unsalted butter and sugars until light and fluffy. Add in the eggs, coconut cream and vanilla extract beat until combined.
3. Add flour, baking powder, desiccated coconut and beat again until smooth.
4. Fold in the chopped pineapple rings
5. Spoon equal amounts into each cupcake case and bake for 18-20 minutes (until a skewer comes out clean).
6. Remove from oven, leave in the tin for 10 minutes then transfer to a wire rack to cool completely.
7. To make the icing, beat the butter until pale and fluffy, then add the icing sugar, coconut cream and white rum and beat again until soft and creamy.
8. Either using a spoon or pipe on to your fully cooled cupcakes and top with glace cherries and pineapple chunks


ENJOY! If you opt for Pina Colada Cupcakes, please do share a picture!


Courgette & Lime Cupcakes

Courgette & Lime Cupcakes

INGREDIENTS

CUPCAKE
• 200g unsalted butter
• 200g caster sugar
• 200g grated courgette
• 3 large eggs
• 255g self-raising flour
• ½ tsp bicarbonate of soda
• ½ tsp baking powder
• Zest of one lime

ICING
• 250g mascarpone
• 250g unsalted butter
• 250g icing sugar
• Juice & zest of one lime

FOR DECORATION
• Handful of chopped pistachios

METHOD
1. Line a muffin tin with 12 deep cupcake cases and preheat the oven to 175 degrees fan.
2. Beat together your unsalted butter and sugar until light and fluffy. Add in the eggs and grated courgette and beat again.
3. Add flour, bicarbonate of soda, baking powder and lime zest and beat again until smooth.
4. Spoon equal amounts into each cupcake case and bake for 18-20 minutes (until a skewer comes out clean).
5. Remove from oven, leave in the tin for 10 minutes then transfer to a wire rack to cool completely.
6. To make the icing, beat the butter until pale and fluffy, then add the icing sugar and juice and zest of lime and beat again until fully combined
7. Add the mascarpone and beat again until soft and creamy
8. Either using a spoon or pipe on to your fully cooled cupcakes, top with the chopped pistachios.


ENJOY! If you opt for Courgette & Lime Cupcakes, please do share a picture!


Cookie Cupcakes

Cookie Cupcakes

INGREDIENTS

CUPCAKE
• 200g unsalted butter
• 200g caster sugar
• 3 large eggs
• 175g self-raising flour
• 25g cocoa powder
• 2 tsp baking powder
• 1 tsp vanilla extract
• 100g milk chocolate chips
• 100g white chocolate chips

COOKIE DOUGH ICING
• 250g unsalted butter
• 200g brown sugar
• 250g icing sugar
• 250g heat treated flour
• 2 tsp vanilla
• 4 tbsp milk
• 200g milk chocolate chips

METHOD
1. Line a muffin tin with 12 deep cupcake cases and preheat the oven to 175 degrees fan.
2. Beat together your unsalted butter and sugar until light and fluffy. Add in the eggs and vanilla extract beat until combined.
3. Add flour, baking powder, cocoa powder, milk chocolate and white chocolate chips and beat again until smooth.
4. Spoon equal amounts into each cupcake case and bake for 18-20 minutes (until a skewer comes out clean).
5. Remove from oven, leave in the tin for 10 minutes then transfer to a wire rack to cool completely.
6. To make the cookie dough icing, beat the butter until pale and fluffy, then add the brown sugar and icing sugar, vanilla extract, and milk and beat again until soft and creamy.
7. Add in the heat-treated flour and milk chocolate chips and beat until a cookie dough is formed
8. Either using a spoon or ice cream scoop, scoop some of the edible cookie dough and pop on to the top of your fully cooled cupcakes.


ENJOY! If you opt for Cookie Cupcakes, please do share a picture!


Baileys Chocolate Cake

Baileys Chocolate Cake

INGREDIENTS

CHOCOLATE CAKE
• 250g unsalted butter
• 250g light brown sugar
• 250g dark chocolate, melted then cooled
• 4 large eggs
• 350g self-raising flour
• 150g soured cream
• 150ml Baileys

 ICING
• 100g white chocolate melted
• 500g unsalted butter
• 500g icing sugar
• 45ml Baileys

METHOD

  1. Grease and line 3 x 20cm round springform cake tins and preheat the oven to 160 degrees fan.
  2. Beat together your unsalted butter and sugar until light and fluffy. Add in the eggs and beat until combined.
  3. Add the Baileys, dark chocolate and soured cream and beat again until fully combined
  4. Add flour, beat again until smooth.
  5. Divide equally between the three tins and smooth across
  6. Bake both cakes on the middle shelf for 20 minutes or until a skewer comes out clean.
  7. Remove from oven, leave in the tin for 10 minutes then transfer to a wire rack to cool completely.
  8. To make the buttercream, beat the butter until pale and fluffy, then add the icing sugar, white chocolate and Baileys and beat again until soft and creamy.

To Assemble

  1. Start with one layer of the chocolate cake on to a cake board or plate, put a generous layer of buttercream across the top, then put another chocolate cake layer on and repeat the process.
  2. Pipe or spread the remaining buttercream on to the top of the cake.

ENJOY! If you opt for Baileys Chocolate Cake, please do share a picture!


Lemon & White Chocolate Yule Log

Lemon & White Chocolate Yule Log

INGREDIENTS
Cake
• 85g caster sugar
• 3 eggs
• 100g plain flour
• zest of 1 lemon
• 1 tsp baking powder

Filling
• 80g butter
• 150g icing sugar
• 250g mascarpone
• 6 tbsp lemon curd

Icing decoration
• 200g white chocolate, melted and cooled
• 250g butter
• 250g icing sugar

METHOD
• Grease a silicone Swiss roll tray (this is the one https://www.amazon.co.uk/Pieces-Silicone-Reusable-Biscuits-Macarons/dp/B098RR2Z4X/ref=mp_s_a_1_6?crid=1FV146YQ0LHY3&keywords=silicone+swiss+roll+baking+tray&qid=1639314830&sprefix=silicone+swiss+%2Caps%2C107&sr=8-6 I use, it’s worth it’s weight in gold for making these, it’s significantly easier than using a greased tray). Alternatively grease and line a baking tray. Preheat the oven to 180 degrees fan
• Using a stand mixer or electric hand mixer beat the eggs and sugar until they are pale, thick and creamy (around 6-7 minutes)
• Fold in the lemon zest, flour and baking powder.
• Pour into lined tray, spread evenly and cook for 10 mins. If you are using the silicone tray for easy I pop on top of an ordinary tray to bake, this makes it easier to remove from the oven.
• Remove from the oven, run a knife around the edges and leave to cool on a wire rack for 5 minutes. (If using the silicone tray leave to cool completely in there, no need to turn out).
• Turn out on to baking paper to cool completely if using an ordinary baking tray.
• To make the filling, beat the butter and icing sugar until smooth and creamy, then add the mascarpone and beat again
• To make the icing for decoration, add butter, melted and cooled white chocolate and icing sugar to a bowl and beat until smooth and creamy

To Assemble
• Dust a surface with icing sugar and pop on the cooled cake onto it. Using a palette knife, smooth mascarpone mixture all over the surface, followed by the lemon curd.
• Roll the cake up length ways (so the longest side is facing you), then at an angle chop a piece or the end off, which you can then place in the middle to look more like a log.
• Cover the entire outside in the white chocolate butter icing and then use a fork to make imprints similar to wood. Dust with a little icing sugar.

ENJOY! If you opt for lemon & white chocolate Yule log, please do share a picture!


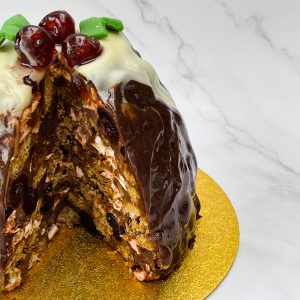
Christmas Pudding Tiffin

Christmas Pudding Tiffin

INGREDIENTS
Tiffin
• 225g hobnobs
• 225g milk chocolate
• 150g dark chocolate
• 150g unsalted butter
• 160g golden syrup
• 25g glace ginger
• 100g Italian mixed peel
• 125g marshmallows (mini or large chopped up)
• 200g glace cherries

Decoration and ganache
• 75g dark chocolate
• 75g milk chocolate
• 150ml double cream
• 100g white chocolate melted
• Royal icing holly leaves

METHOD
• Use cling film to line a 1.2 litre pudding bowl, leaving extra cling film hanging over the sides.
• Crush the biscuits into pieces, you can just crush with your hands or use a rolling pin
• Melt the chocolate, butter and golden syrup in saucepan over a low heat and stir occasionally.
• In a separate bowl add the crushed biscuits, glace ginger, Italian mixed peel, marshmallows and glace cherries (reserve three for decoration) and stir to combine
• Remove the saucepan from the heat once all melted and pour over the biscuit mixture and stir thoroughly to combine.
• Spoon the mixture into the lined bowl, pushing down firmly to minimise air pockets. Leave to cool, then pop in the fridge to set overnight
• The following day, turn upside down on to a wire rack that has a piece of baking parchment underneath it.
• Make the chocolate ganache, combine the dark and milk chocolate with the cream and heat on 30 second bursts in the microwave, stir thoroughly between each burst until a smooth ganache is produced
• Pour the ganache over the top of the pudding and using a palette knife ensure it is all covered. Set in the fridge for 10 minutes to firm a little
• Melt the white chocolate in the microwave, this will take around 45 seconds.
• Remove the pudding from the fridge, spoon the white chocolate on to the top and let drip down, pop the remaining 3 cherries on the top. You can add royal icing holly leaves to decorate too.

ENJOY! If you opt for Christmas Pudding Tiffin, please do share a picture!


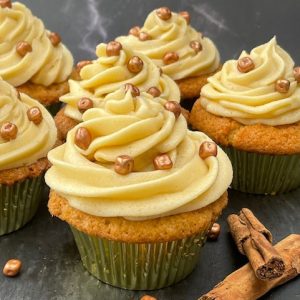
Christmas Spiced Cupcakes

Christmas Spiced Cupcakes

INGREDIENTS
Cupcakes
• 200g unsalted butter
• 150g light muscovado sugar
• 50g golden caster sugar
• 200g plain flour
• 2 tsp baking powder
• ½ tsp vanilla extract
• 1 tsp ground ginger
• ½ tsp ground cinnamon
• ¼ tsp ground nutmeg
• 3 eggs

Icing
• 200g unsalted butter
• 50g light muscovado sugar
• 3 tbsp double cream
• 400g icing sugar
• Large pinch of cinnamon

Optional for decoration – decorative orange chocolate pieces

METHOD
1. Line a muffin tin with 12 cupcake cases and preheat the oven to 175 degrees fan.
2. Beat together your unsalted butter and sugars until light and fluffy. Add in the eggs and vanilla extract and beat until combined.
3. Add flour, baking powder, ground ginger, cinnamon, nutmeg until smooth.
4. Spoon equal amounts into each cupcake case and bake for 18 minutes.
5. Remove from oven, leave in the tin for 10 minutes then transfer to a wire rack to cool completely.
6. To make the buttercream, beat the butter until pale and fluffy, then add the icing sugar, muscovado sugar, double cream and cinnamon and beat again until soft and creamy.
7. Either pipe or spoon onto the cooled cupcakes
8. Optional: scatter orange chocolate pieces


ENJOY! If you opt for Christmas Spiced Cupcakes, please do share a picture!


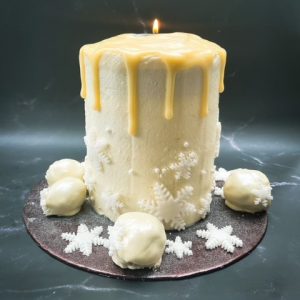
Chocolate & orange candle cookie cake with cookie pops

Chocolate & orange candle cookie cake with cookie pops

INGREDIENTS
COOKIE CAKE
• 550g plain flour
• 2 tsp bicarbonate of soda
• 2 tbsp cornflour
• 240g unsalted butter
• 100g granulated sugar
• 290g light brown sugar
• 2 large eggs
• 200g white chocolate chips
• 280g chocolate orange bars broken into chips
• Zest of an orange
• ¾ tsp cinnamon

BUTTERCREAM
• 500g unsalted butter
• 750g icing sugar
• 1 tbsp juice from an orange
• 250g white chocolate, melted

GANACHE
• 75g white chocolate
• 25ml double cream

Optional for decoration
– One tealight holder and tealight candle.
– 150g white royal icing and snowflake cutter
– A few edible pearls

METHOD

  1. Line a 4 x 12cm spring form cake tins and 1 x 6-inch cake tin and preheat the oven to 170 degrees fan.
  2. In a bowl combine the flour, bicarb, salt, and cornflour together to ensure it is all evenly distributed
  3. Either using a hand or stand mixer beat together your unsalted butter and sugars until light and fluffy. Add in the eggs and beat until combined
  4. Add in the flour mix, white chocolate chips and chocolate orange chips and beat until a thick dough is formed.
  5. Press amounts of the cookie dough into the 12cm cake tins (about half full) and the remaining into the 6-inch cake tin.
  6. Bake in the oven for 20-25 minutes, the top of the cookies should look cooked and have no movement.
  7. Remove from oven, leave in the tin for 10 minutes then transfer to a wire rack to cool completely.
  8. To make the buttercream, beat the butter until pale and fluffy, then add the icing sugar, white chocolate and orange juice and beat again until soft and creamy.
  9. Make the ganache by combining the white chocolate and cream into a microwavable bowl and heat for 30 seconds, stir well until smooth and glossy, if needed pop back in for a further 10 seconds and stir again.

To Assemble

  1. Begin with the cookie pops. Break the 6-inch cookie in a large bowl into small pieces. Add sufficient of the buttercream to bring together into a “dough” that can be moulded into balls, do this by adding a heaped tbsp at a time and keep stirring through with a spatula.
  2. Make different sized ball cookie pops, pop on to a plate and refrigerate whilst you prepare the rest of the cake.
  3. Start with one of the 12cm cookie cakes and place on to a cake board or plate, put a thin layer of buttercream across the top, then put the next cookie cake on and repeat the process. When you get to the top layer scoop out, using a spoon a hole large enough to hold your tealight holder and tealight. (Skip this step if you do not want to use the candle)
  4. Using a small amount of buttercream create a thin layer of icing covering the entire cookie cake (the crumb coat), pop in the fridge for 30 mins to harden.
  5. Remove from the fridge and cover in a full layer of buttercream. Smooth off using a cake scraper. (Reserve a little buttercream if you are decorating with the icing snowflakes)
  6. Using a piping bag with a small hole or a spoon, pipe the ganache around the top of the cake, allowing to drip over the edges, then across the top of the cake, avoiding the hole you have created to hole the candle. Pop in the fridge for 30 mins to set.
  7. With the remaining ganache, remove the cookie pops from the fridge and cover fully in ganache and put back in the fridge to set.
  8. If opting to make the snowflake decorations, roll out the royal icing and cut approximately 8 snowflakes (depending on the size of your cutter this could be slightly more or less)
  9. Once set add the cookie pops around the base of the candle cake and stick on the snowflakes around the candle. Decorate with the edible pearls.
  10. Add the tealight holder and candle on to the top of the cake – your cookie cake candle table centrepiece is created!

ENJOY! If you opt for Chocolate & orange candle cookie cake with cookie pops , please do share a picture!


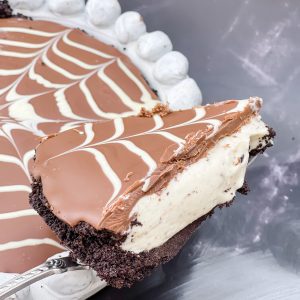
Halloween Spooky Spider Cookies & Cream Pie

Halloween Spooky Spider Cookies & Cream Pie

INGREDIENTS

PIE BASE
• 75g unsalted butter
• 350g Oreos

COOKIES & CREAM FILLING
• 1 can condensed milk
• 300ml double cream
• 250g mascarpone
• 300g cookies and cream spread

CHOCOLATE TOPPING
• 300g milk chocolate melted
• 100g white chocolate melted
• 1/2 tsp vegetable oil

METHOD

  1. Grease a large, deep flan or tart tin.
  2. First make the base. Blend the biscuits to fine crumbs using a food processor. Melt the butter and then mix in to the crumbs.
  3. Press the biscuits into the base and up the sides of the tin to make a pie case. Place in the fridge for 5-10 minutes whilst you make the filling.
  4. Using a hand or stand mixer (the whisk attachment), combine the mascarpone, cream, condensed milk and cookies and cream spread. Whisk until thick.
  5. Remove the base from the fridge and spoon on top of the Oreos, even the top with a palette knife or the back of the spoon and put back in to the fridge.
  6. Melt the milk chocolate in the microwave in 30 second bursts, stirring between each one. Once fully melted add the oil and stir thoroughly to combine. Melt the white chocolate in a separate bowl.
  7. Remove the pie from the fridge and pour on the melted milk chocolate and oil mixture until it is all covered.
  8. Either pipe or drizzle off a spoon, circles of white chocolate on to the milk chocolate.
  9. Use a cocktail stick or skewer, start at the centre of the cake, drag the stick straight out to the edges to make a spider’s web.  Chill for an hour or until you are ready to serve.


ENJOY! If you opt for Halloween Spooky Spider Cookies & Cream Pie, please do share a picture!


Lemon & Chocolate Layer Cake

Lemon & Chocolate Layer Cake

INGREDIENTS

CHOCOLATE CAKE
• 250g unsalted butter
• 250g light brown sugar
• 4 large eggs
• 200g self-raising flour
• 50g cocoa powder

WHITE CHOCOLATE & LEMON CAKE
• 250g unsalted butter
• 250g golden caster sugar
• 4 large eggs
• 100g white chocolate melted and cooled
• Juice and zest of 1 lemon
• 250g self-raising flour

BUTTER ICING
• 300g white chocolate melted
• 500g unsalted butter
• 1000g icing sugar
• Juice of half a lemon

GANACHE
• 150g white chocolate
• 50ml double cream
• Yellow food colouring

OPTIONAL DECORATIONS:
• Handful of white chocolate and milk chocolate chips
• Lemon peel

METHOD

  1. Grease and line 2 x 8inch deep round springform cake tins and preheat the oven to 170 degrees fan.
  2. First make the chocolate cake. Beat together your unsalted butter and sugar until light and fluffy. Add in the eggs and beat until combined.
  3. Add flour and cocoa powder, beat again until smooth.
  4. Pop to one side whilst you make the second cake.
  5. To make the white chocolate and lemon cake. Beat together your unsalted butter and sugar until light and fluffy. Add in the eggs and beat until combined. Then add the white chocolate, lemon zest and juice, beat again.
  6. Add flour, beat again until smooth.
  7. Spoon into the other lined cake tin.
  8. Bake both cakes on the middle shelf for 50-60 minutes or until a skewer comes out clean.
  9. Remove from oven, leave in the tin for 10 minutes then transfer to a wire rack to cool completely. Once the cakes are completely cool level off the tops then slice each cake in to two, creating four layers in total.
  10. To make the buttercream, beat the butter until pale and fluffy, then add the icing sugar, white chocolate and lemon juice and beat again until soft and creamy.
  11. Make the ganache by combining the white chocolate and cream into a microwavable bowl and heat for 30 seconds, stir well until smooth and glossy, if needed pop back in for a further 10 seconds and stir again. Then add in 2-3 drops of food colouring and stir until completely mixed.

To Assemble

  1. Start with one layer of the chocolate cake on to a cake board or plate, put a thin layer of buttercream across the top, then put a lemon and white chocolate cake layer on and repeat the process, alternating the cake type each time until you get to the top layer of lemon and white chocolate cake.
  2. Using a small amount of buttercream create a thin layer of icing covering the entire cake (the crumb coat), pop in the fridge for 30 mins to harden.
  3. Remove from the fridge and cover in a full layer of buttercream, reserving some to pipe on the top after the ganache. Smooth off using a cake scraper.
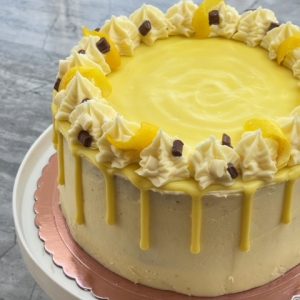
  4. Using a piping bag with a small hole or a spoon, pipe the ganache around the top of the cake, allowing to drip over the edges, then across the top of the cake. Pop in the fridge for 30 mins to set.
  5. Pipe the remaining buttercream around the top of the cake and decorate with chocolate chips and lemon peel.

ENJOY! If you opt for Lemon & Chocolate Layer Cake, please do share a picture!


Chocolate Orange Spooky Spider Cupcakes

Chocolate Orange Spooky Spider Cupcakes

INGREDIENTS

CUPCAKE

  • 200g unsalted butter
  • 200g caster sugar
  • 4 large eggs
  • 150g self-raising flour
  • 50g cocoa powder
  • Zest of orange
  • Juice ½ orange


ICING

  • 250g unsalted butter
  • 500g icing sugar
  • Juice ½ orange
  • Zest of orange
  • 3-4 drops orange food colouring


DECORATION

  • 200g dark chocolate
  • 50ml double cream
  • 6 Oreo cookies
  • Optional: white and black readymade writing icing

METHOD

  1. Line a muffin tin with 12 deep cupcake cases and preheat the oven to 180 degrees fan.
  2. Beat together your unsalted butter and sugars until light and fluffy. Add in the eggs, beat until combined.
  3. Add flour, cocoa powder, orange juice and zest and beat again until smooth.
  4. Spoon equal amounts into each cupcake case and bake for 15-18 minutes.
  5. Remove from oven, leave in the tin for 10 minutes then transfer to a wire rack to cool completely.
  6. To make the spiders web and legs, line a baking tray with greaseproof paper.
  7. Make the ganache by combining the dark chocolate and cream into a microwavable bowl and heat for 30 seconds, stir well until smooth and glossy, if needed pop back in for a further 10 seconds and stir again.
  8. Using a spoon drizzle on to the greaseproof paper 36 leg shapes and 6 spider webs. Chill in the fridge for 30 mins.
  9. To make the buttercream, beat the butter until pale and fluffy, then add the icing sugar, orange juice, zest and food colouring and beat again until soft and creamy.
  10. Pipe onto the cooled cupcakes
  11. Once set, peel the spider’s webs off the greaseproof paper and pop on to the top of six of the cupcakes.
  12. For the spiders, place an Oreo cookie on to the top of the buttercream of the remaining six cupcakes, then add 3 legs on each side of the spider by pushing into the icing. Optional: Using ready-made writing icing draw on two eyes.


ENJOY! If you opt for Chocolate Orange Spooky Spider Cupcakes, please do share a picture!


Coconut, Lime & White Chocolate Loaf cake

Coconut, Lime & White Chocolate Loaf cake

INGREDIENTS

Cake

• 200g unsalted butter
• 200g caster sugar
• 4 large eggs
• 200g self raising flour
• 100g white chocolate, melted
• 1 limes, zest & juice only
• 3 tbsp desiccated coconut
• 150g white chocolate chips

Icing

• 125g butter
• 1/2 lime, zest & juice only
• 250g icing sugar
• 75g melted white chocolate
• 75mls coconut cream

Mascarpone for serving

METHOD

1. Preheat the oven temperature to 160 degrees fan and line a standard loaf tin

2. Using a hand or stand mixer beat the sugar and butter until light and creamy

3. Add eggs and beat again, then add melted white chocolate, lime zest and juice, beat again

4. Add flour and beat until combined

5. Add desiccated coconut and white chocolate chips and fold through the mixture with a spoon

6. Pour the loaf batter into the lined tin and bake for about 55-60 mins or until a skewer comes out clean

7. Remove from the oven and allow to cool on a wire rack

8. Whilst the cake cools, make the icing. Beat the butter in a stand mixer or electric hand mixer until pale and fluffy, add the icing sugar, lime juice, coconut cream and melted white chocolate and beat again until smooth.

9. Pipe or spread with a palette knife the icing over the top of the fully cooled cake.

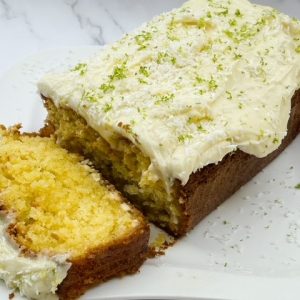
10. Scatter the remaining lime zest and a tsp of desiccated coconut over the top of the icing and serve.


ENJOY! If you opt for Coconut, Lime & White Chocolate Loaf cake, please do share a picture!


Peach, Lime & Ricotta cake

Peach, Lime & Ricotta cake

INGREDIENTS

• 4 peaches
• 1 tbsp light brown sugar
• 150g unsalted butter, melted
• 250g ricotta
• 230g golden caster sugar
• 2 limes, zest only
• 3 large eggs
• 180g self raising flour
• 30g hazelnuts, whole

Mascarpone for serving

METHOD

1. Grease and line with parchment paper a 20cm round springform tin and a baking tray preheat the oven to 170 degrees fan.
2. Chop the peaches in half, remove the stone and then cut the halves into two again, place on to the baking tray (flesh side down) and sprinkle with brown sugar, bake for 12 minutes. When removed from oven, leave on the tray.
3. Combine the ricotta, caster sugar and lime zest into a large bowl, using either a electric hand or stand mixer, beat for around 5-7 minutes.
4. Beat in the eggs one at a time
5. Whilst the beater is still going pour in the melted butter and beat until fully combined
6. Add the flour and baking powder, beat briefly until just combined
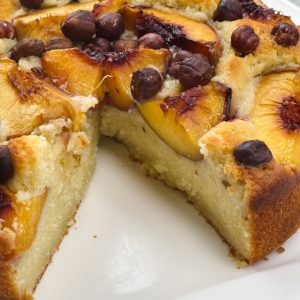
7. Pour the cake mixture into the lined tin and top with the peaches, flesh side facing up. Scatter the hazelnuts over the top.
8. Bake in the oven for 50 minutes. Leave to cool and either serve warm or can be served cold.
9. Serve with a scoop of mascarpone

ENJOY! If you opt for Peach, Lime & Ricotta cake, please do share a picture!


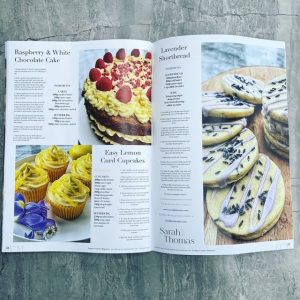
Feature in Femme Country Magazine

I was absolutely delighted to be asked by the wonderful Bronte Clare Mitchell (Editor of Femme Country Magazine) to contribute three new wonderful recipes for the Summer Edition of the magazine. She shared my journey of founding Clockface Beauty and now the progression to the launch of Sarah J Thomas Lifestyle and within that Sarah J Thomas Bakes.

I have shared some images below, but you can order your copy directly from their website.


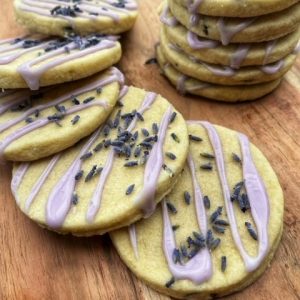
Lavender Shortbread

Lavender Shortbread

INGREDIENTS

SHORTBREAD
• 300g plain flour
• 200g cold butter
• 100g caster sugar
• 1 tsp edible lavender

ICING
• 3 tbsp icing sugar
• drop of water
• violet food colouring
• edible lavender

METHOD

1. Line a baking tray with greaseproof paper and preheat the oven to 160 degrees fan.
2. Either using a food processor or crumbing with your hands, combine the butter and flour.
3. Add the sugar and edible lavender and either pulse or combine with hand until a dough is formed. If its still a little dry add a splash of milk (you don’t want the dough to be too sticky).
4. Turn out on to a floured worksurface and knead the dough slightly.
5. Roll out the dough until about a 1cm thick, using a 3-inch cutter, cut out 12 circles and place on to the baking tray.
6. Bake in the oven for 10-12 minutes.
7. Remove from oven, leave on the tray for 10 minutes then transfer to a wire rack to cool completely.
8. To make the icing, add the icing sugar and a splash of water to a bowl, mix using a spoon until a pourable consistency is formed. Add in a couple of drops of violet food colouring (optional) to create a pale lavender colour.
9. Pipe or drip using a spoon over each shortbread and then scatter additional edible lavender over the top.
10. Store in an airtight container.

ENJOY! If you opt for Lavender Shortbread, please do share a picture!


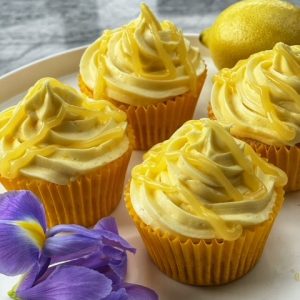
Easy Lemon Curd Cupcakes

Easy Lemon Curd Cupcakes

INGREDIENTS

CUPCAKES
• 200g unsalted butter
• 200g caster sugar
• 3 large eggs
• 1 tsp vanilla extract
• 200g plain flour
• 2 tsp baking powder
• Zest of 2 lemons
• Juice of 1 lemon
• 160g shop bought lemon curd

BUTTER ICING
• 250g unsalted butter
• 500g icing sugar
• Zest and juice of one lemon

Optional to decorate – 160g shop bought lemon curd

METHOD

1. Line a muffin tin with 12 cupcake cases and preheat the oven to 180 degrees fan.
2. Beat together your unsalted butter and sugars until light and fluffy. Add in the eggs and vanilla extract and beat until combined.
3. Add flour, baking powder, lemon juice and zest and beat again until smooth.
4. Spoon equal amounts into each cupcake case and bake for 12-15 minutes.
5. Remove from oven, leave in the tin for 10 minutes then transfer to a wire rack to cool completely.
6. Once cool use a small pairing knife to make a cone shaped hole in the cupcakes and using a teaspoon and knife fill with the lemon curd.
7. To make the buttercream, beat the butter until pale and fluffy, then add the icing sugar, lemon zest and juice and beat again until soft and creamy.
8. Either pipe or spoon onto the cooled cupcakes
9. Optional: drizzle with lemon curd over the top of the buttercream.

ENJOY! If you opt for Easy Lemon Curd Cupcakes, please do share a picture!


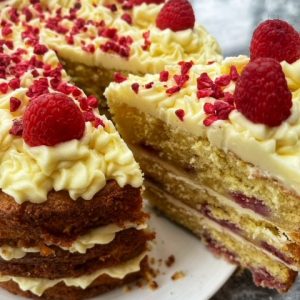
Raspberry & White Chocolate Cake

Raspberry & White Chocolate Cake

INGREDIENTS

CAKES
• 400g unsalted butter
• 400g caster sugar
• 400g self-raising flour
• 8 medium eggs
• 300g raspberries
• 300g white chocolate, melted

BUTTER ICING
• 350g unsalted butter
• 700g icing sugar
• 300g white chocolate, melted

Optional to decorate – handful fresh raspberries & freeze dried raspberries

METHOD

  1. Grease and line 3 x 8inch round springform cake tins and preheat the oven to 180 degrees fan.
  2. Beat together your unsalted butter and sugar until light and fluffy. Add in the eggs and beat until combined. Then add the melted and cooled white chocolate and beat again.
  3. Add flour and beat again until smooth. Then fold in the raspberries to the cake mixture.
  4. Spoon equal amounts into each tin and bake for 30-35 minutes or until a skewer comes out clean.
  5. Remove from oven, leave in the tin for 10 minutes then transfer to a wire rack to cool completely. Once the cakes are completely cool I always level off the top of each one, it just makes it much easier to pipe and stack.
  6. To make the buttercream, beat the butter until pale and fluffy, then add the icing sugar and white chocolate and beat again until soft and creamy.
  7. Either pipe or spoon onto the first cake, add the second cake on top and repeat the process.

Optional: Once the top of the cake has been iced decorate with fresh raspberries and freeze dried raspberries

ENJOY! If you opt for Raspberry & White Chocolate Cake, please do share a picture!


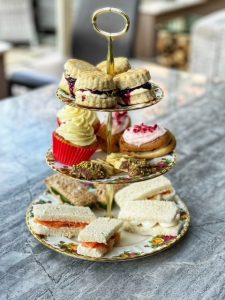
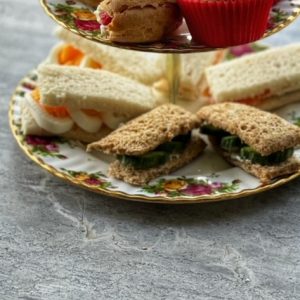
Your Perfect Afternoon Tea

Your Perfect Afternoon Tea

What makes the perfect afternoon tea? Well traditionally an afternoon tea consists of finger sandwiches, followed by scones with jam and cream, then cakes, and obviously all accompanied with a pot of tea. But now, afternoon tea can be with anything you like, sausage rolls, muffins, biscuits and also with a side of champagne (my personal preference!) instead of tea.

I’ve created a menu with bakes to impress, you can prepare most ahead of time and then just sit back and enjoy the fruits of your labour with family and friends. One thing not to overlook is serving with the perfect drink, perhaps start with a prosecco or champagne, then on to a traditional tea (tea leaves are best) and then finish with a fresh mint tea after all that food! All the individual recipes are linked in the menu below.

THE MENU

Finger Sandwiches

Cucumber

Smoked Salmon and Cream Cheese

Egg & Mayonnaise

Scones

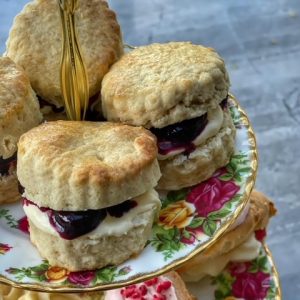
Plain scones with clotted cream and blueberry compote

Cakes & Biscuits

Lemon & White Chocolate Cupcakes

Strawberry & Mascarpone Eclairs

Chocolate & Pistachio Viennese Whirls

ENJOY! If you opt for Your Perfect Afternoon Tea, please do share a picture!


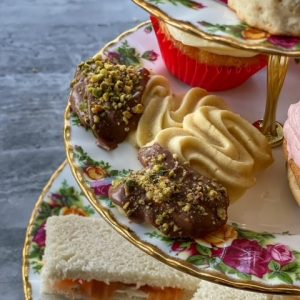
Chocolate & Pistachio Viennese Whirls

Chocolate & Pistachio Viennese Whirls

Makes 10 – Part of “Your Perfect Afternoon Tea

INGREDIENTS

150g unsalted butter
35g icing sugar
150g plain flour
35g cornflour
1 tsp vanilla extract

To decorate
130g milk chocolate, melted
25g pistachios, shelled and finely chopped

METHOD

1. Preheat your oven to 170 degrees fan and line a baking tray with greaseproof paper

2. In a stand mixer (or electric hand mixer) beat the butter, icing sugar and vanilla extract until pale and light

3. Beat in the flour and the cornflour until fully combined

4. Spoon the dough into a piping bag and pipe swirls on to the baking tray (these can be any shape you want). Leave some space between each one on the tray

5. Bake in the oven for 8-10 minutes. When you remove from the oven place the tray on to a wire rack and leave them there to cool as they will harden as they do so

6. Once completely cooled place a wire rack on to a piece of greaseproof paper and pop all the individual biscuits on to the rack. Spoon the melted milk chocolate over half of the biscuits and then scatter with the chopped pistachios. Leave the chocolate to set completely before removing.

ENJOY! If you opt for Chocolate & Pistachio Viennese Whirls, please do share a picture!


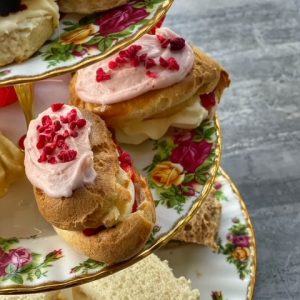
Strawberry & Mascarpone Eclairs

Strawberry & Mascarpone Eclairs

Makes 10 – Part of “Your Perfect Afternoon Tea

INGREDIENTS

Eclairs
150g plain flour
20g golden caster sugar
75g unsalted butter
75ml milk
125ml water
3 eggs
1 egg yolk

Filling
150g mascarpone
100g double cream
100g icing sugar
10-12 sliced strawberries

Topping
250g icing sugar
50g white chocolate
4 strawberries, chopped

Optional to decorate
Freeze dried strawberries

METHOD

1. Preheat your oven to 160 degree fan. Line a large baking tray with greaseproof paper

2. Combine in a saucepan the sugar, butter, milk and water and bring to the boil. Remove the pan from the hear and tip in the flour, beat the mixture (I use a wooden spoon until a dough is formed)

3. Tip into a food processor and pulse for a couple of minutes to cool

4. Add the whole eggs gradually, pulsing in between

5. Once it is fully combined to a smooth dough, pop the mixture into a piping bag (a 1.5cm nozzle) and pipe on to the greaseproof paper. Pipe each éclair about 10cm in length, then re-pipe another layer on top the same length, this makes it much easier once they are baked to cut into halves and keeps them light

6. Beat the yolk and the brush over the top of each éclair before popping in the oven

7. Bake for 50 minutes, the eclairs will be golden brown and dry. Place on to a wire rack to cool completely before filling

8. Whilst they cool prepare the filling. In a stand mixer or electric hand mix combine all the ingredients (except the sliced strawberries) and then beat until a stiff but pipeable mixture is formed

9. Next create the topping, using either a stand mixer or electric hand mix beat all the ingredients until a stiff mixture is formed

10. To assemble, slice the cooled eclairs in half horizontally, lay the sliced strawberries on the bottom half, then spread or pipe the filling on top. Put the top half of the éclair back on, then spread the topping over the top. Optional: sprinkle freeze dried strawberries on top.

ENJOY! If you opt for Strawberry & Mascarpone Eclairs, please do share a picture!


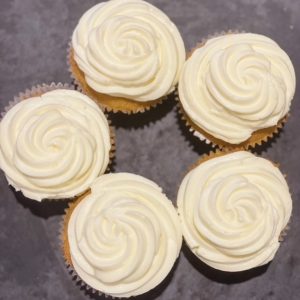
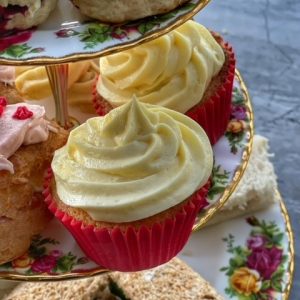
Lemon & White Chocolate Cupcakes

Lemon & White Chocolate Cupcakes

Makes 12 – Part of “Your Perfect Afternoon Tea

INGREDIENTS

Muffin
200g caster sugar
200g unsalted butter
3 eggs
200g plain flour
2 tsp baking powder
3 tbsp lemon curd (shop bought)
1tsp vanilla extract

Icing
200g salted butter
300g icing sugar
200g white chocolate, melted
100g mascarpone
4 tbsp lemon curd (shop bought)

METHOD

  1. Line a muffin tin with 12 cupcake cases and preheat the oven to 180 degrees fan
  2. Beat together your unsalted butter and sugars until light and fluffy. Add in the eggs and vanilla extract and beat until combined
  3. Add flour, baking powder and beat again until smooth. Finally, add the lemon curd and beat again
  4. Spoon equal amounts into each cupcake case and bake for 12-15 minutes or until a skewer comes out clean
  5. Remove from oven, leave in the tin for 10 minutes then transfer to a wire rack to cool completely
  6. To make the white chocolate and lemon icing, beat the butter until pale and fluffy, then add the icing sugar, melted white chocolate, lemon curd and mascarpone and beat again until soft and creamy
  7. Either pipe or spoon onto the cooled cupcakes

ENJOY! If you opt for Lemon & White Chocolate Cupcakes, please do share a picture!


Plain scones with clotted cream and blueberry compote

Plain scones with clotted cream and blueberry compote

Makes 10 small – Part of “Your Perfect Afternoon Tea

INGREDIENTS

Scone
350g self raising flour
1 tsp baking powder
85g unsalted butter
50g caster sugar
100g milk
75g yoghurt
1tsp vanilla extract
Beaten egg to glaze

Blueberry Compote
300g blueberries
½ lemon zested and juiced
30g golden caster sugar

To Serve
Clotted cream

METHOD

1. Heat your oven to 220 degrees, line a large baking tray

2. Using a food processer (I use a Magimix, but you can use any and I guarantee they come out perfect every time with absolute minimal effort!) combine the flour, salt, baking powder butter and sugar, pulse until a fine crumb is formed

3. In a jug combine the milk, yoghurt, and vanilla extract

4. Pour the milk mixture into the food processor slowly, pulsing each time until a dough is formed

5. Turn out on to a floured surface and work with your hands a little, add more flour on to the surface if it is too sticky

6. Roll out until about 3-4 cm thick, then use a 5cm cutter to press out your scones

7. Pop on to the baking tray and brush the tops with the beaten egg

8. Bake for 10 mins until they are risen and golden brown on top

9. Remove from oven and cool on a wire rack

10. Whilst they are cooling make the blueberry compote

11. Combine all the ingredients for the compote in a saucepan, cook on a low heat for 15-20 minutes stirring every so often. Remove from the heat and allow to cool before serving (note, this can be made in advance and left in the fridge)

12. To assemble, slice the scones in half, add a dollop of the clotted cream to one half, top with the blueberry compote and pop the top back on

13. This should be displayed on the very top of the cake stand if you are using one

ENJOY! If you opt for Plain scones with clotted cream and blueberry compote, please do share a picture!


Finger Sandwiches

Finger Sandwiches

Serves 2 – Part of “Your Perfect Afternoon Tea

INGREDIENTS

Pre sliced brown bread 2 slices
Pre sliced white bread 4 slices
¼ cucumber cut into slices
2 eggs hard boiled (8 minutes), cooled and sliced
50g smoked salmon
25g full fat cream cheese
25g mayonnaise
Spreadable butter

METHOD

1. Remove all crusts from the bread and butter each slice

2. On two white slices spread mayonnaise

3. On two white slices spread cream cheese

4. Cut each slice into half to create your “fingers”

5. Add the sliced cucumber into the buttered brown bread

6. Add the sliced egg into the mayonnaise white bread

7. Add the smoked salmon to the cream cheese white bread

8. Arrange on the lowest plate if using a cake stand


ENJOY! If you opt for Finger Sandwiches, please do share a picture!


Cherry, Almond & White Chocolate Loaf Cake

Cherry, Almond & White Chocolate Loaf Cake

This is a very simple loaf cake, it’s delicious and quick and easy to make. A cherry and white chocolate chip loaf with white chocolate buttercream and mascarpone icing, topped with toasted almonds.

INGREDIENTS

Loaf cake
200g unsalted butter
200g caster sugar
4 large eggs
200g self raising flour
200g glace cherries
150g white chocolate chips

Icing
125g unsalted Butter
250g icing Sugar
125g mascarpone
125g white Chocolate (melted)

Decoration
50g flaked almonds

METHOD


1. Preheat the over to 200 degrees and scatter the flaked almonds on a lined baking tray, bake for 4-5 minutes until lightly golden. Remove from the oven and pop into a bowl and leave to one side

2. Reduce the oven temperature to 160 degrees fan and line a loaf tin

3. Using a hand or stand mixer beat the sugar and butter until light and creamy

4. Add eggs and beat again, then add flour and beat until combined

5. Add glace cherries and white chocolate chips and fold through the mixture with a spoon

6. Pour the loaf batter into the lined tin and bake for about 55-60 mins or until a skewer comes out clean

7. Remove from the oven and allow to cool on a wire rack

8. Whilst the cake cools, make the icing. Beat the butter in a stand mixer or electric hand mixer until pale and fluffy, add the icing sugar, mascarpone and melted white chocolate and beat again until smooth.

9. Pipe or spread with a palette knife the icing over the top of the fully cooled cake.

10. Scatter the toasted almonds over the top of the icing and serve.


ENJOY! If you opt for Cherry, Almond & White Chocolate Loaf Cake, please do share a picture!


Black Forest & Pistachio Cheesecake (No Bake)

Black Forest & Pistachio Cheesecake

This no bake, rich, delicious cherry and pistachio no bake cheesecake makes the perfect weekend treat. Its one of the most simple recipes you could ever create, yet maximises on flavour and tasty joy!

INGREDIENTS

Base
50g unsalted butter (melted)
300g milk chocolate digestives

Cheesecake
300ml double cream
500g mascarpone
100g icing sugar
200g milk chocolate (melted)
200g dark chocolate (melted)
200g fresh cherries (pitted and chopped )
100g Morello cherry jam
100g pistachios (finely chopped – I use a food processor for this)

METHOD

1. Line a deep 8 inch loose bottom cake tin with grease proof paper.

2. Using a food processor blitz the digestives to a fine crumb, then add in the melted butter and pulse until all combined.

3. Press down the biscuit base into the bottom of the lined tin and push down so it is even using the back of a spoon. Refrigerate whilst you make the cheesecake.

4. Put the mascarpone, cream, melted chocolates and icing sugar in a large bowl with an electric hand mix or a stand mixer and beat until it is all combined and thick (if you over work add a couple of tbsp of milk and beat again).

5. Add in the Morello jam and beat again briefly

6. Fold in the chopped cherries with a wooden spoon or spatula.

7. Remove the base from the fridge and spoon on top level off with the back of a spoon.

8. Scatter the finely chopped pistachios all over the surface. Then pop back in the fridge to firm up for around 3-4 hours.

9. When ready to serve, remove from the fridge and take out of the spring form tin on to a plate. (Tip – use a knife around the edge of the cheesecake before removing from the tin.

10. Store in the fridge and will last around 4 days.


ENJOY! If you opt for Black Forest & Pistachio Cheesecake, please do share a picture!


Tiramisu Layer Cake

Tiramisu Layer Cake

Coffee, chocolate, mascarpone and a beautifully light Genoise sponge, could a combination get any better. This is a show stopper, looks incredible, tastes even better. It is light, moist and packed with flavour, a must bake!

INGREDIENTS

Genoise Sponge
50g unsalted butter
250g caster sugar
250g plain flour
pinch of salt
8 large eggs

Coffee Syrup
2 tbsp instant coffee powder
60ml caster sugar
60ml boiling water

Mascarpone Cream
400g mascarpone
100g icing sugar
100g double cream
1/2 tsp vanilla essence

Coffee Butter Cream
350g unsalted butter
50g mascarpone
500g icing sugar
50ml double cream
2 tsp coffee in 30ml boiling water

Dark Chocolate Ganache
75g milk chocolate
75g dark chocolate
150ml double cream

Dark Chocolate Ganache
25g coffee beans
100g dark chocolate

METHOD

Genoise Cake

1. Preheat your oven to 180 degrees fan and grease and line 8inch cake tins with either butter, or my personal recommendation (which never fails me), PME release a cake spray

2. Using a stand mixer or electric hand mixer, beat the sugar and eggs until the mixture has about trebled in size and is thicker and pale in colour, this will take around 7-9 minutes

3. Put the flour and salt into the bowl and fold in by hand using a wooden spoon, try to knock out as little air as possible. Add the melted butter and fold in until all combined

4. Divide the mixture between the two greased tins and bake in the oven for 25-30 mins. The cakes will be done when risen and a slight spring to the touch.

5. Remove from the oven and leave to cool in the tin for 10 minutes before turning out on to a wire rack to cool completely. When they are completely cooled cut each cake into two horizontally to create four layers.

Chocolate covered Coffee Beans

1. Preheat your oven to 220 degrees. Lay the coffee beans on a lined baking tray and roast in the oven for 3-4 minutes. Leave to cool.

2. Melt the dark chocolate in 30 second bursts in the microwave and then tip in the cooled roasted beans.

3. Line a plate with a piece of greaseproof paper and pour the chocolate bean combination on to it, spreading into a single layer.

4. Leave in the fridge to set, when it is set completely break up into shards with your hands.

Coffee Syrup

1. Combine all the ingredients in a cup and stir until dissolved, leave to one side until assembly is required.

Mascarpone Cream

1. In a stand mixed combine all the ingredients and beat until stiff peaks are formed, put to one side ready for assembly.

Coffee Butter Cream

1. In a stand mixed combine the butter and mascarpone, beat until pale and soft.

2. Add the icing sugar, coffee and double cream and beat again until smooth and creamy, leave to one side ready for assembly.

Dark Chocolate Ganache

1. Put the chocolates and cream into a microwavable bowl, heat at 30 second intervals stirring vigorously between each burst, do this twice (so 60 seconds in total). Keep stirring even when you think it won’t come together, it will and it will be a glossy, thick finish.

Assembly

1. Pop the base layer of the Genoise sponge on a cake board, spoon over a quarter of the coffee syrup all over the top. Then top with a third of the mascarpone cream, repeat this process until you have popped the top layer on and only covered it in the coffee syrup (not the mascarpone).

2. Cover the top and sides of the cake in the coffee buttercream, using a scraper or pallet knife to smooth the sides. Reserving some for piping the base and top (this is optional). Then refrigerate for 10 minutes.

3. Remove from the fridge then using a spoon pour gently the dark chocolate ganache into the centre of the cake and gently tease over the edges to create drips. It doesn’t matter if they are uneven. Refrigerate for 10 minutes.

4. Pipe on to the top of the ganache some more buttercream if you wish and I pipe using the rope technique around the base, however both of these are optional.

5. Decorate with the shards of the chocolate covered coffee beans.
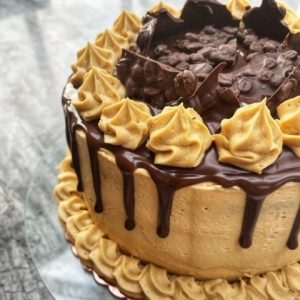


ENJOY! If you opt for Tiramisu Layer Cake, please do share a picture!
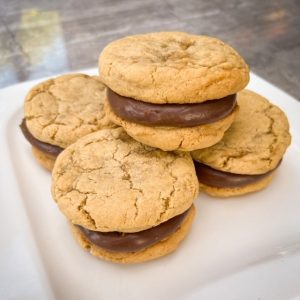


Dreamy Oreo Cake

Dreamy Oreo Cake

Do you or your family love Oreo cookies as much as my two boys do? If the answer is yes, this is the bake for you. A triple layer stack of Oreo goodness, it’s utterly delicious and a fabulous cake for sharing with family and friends.

INGREDIENTS

Chocolate Cake
350g unsalted butter
350g light brown sugar
300g self raising flour
50g cocoa powder
50g melted dark chocolate
6 large eggs

Oreo Butter Icing
300g icing sugar
300g unsalted butter
1 tsp vanilla essence
154g Oreos, lightly crushed (I just break up with my hands)
50ml double cream

Chocolate Cream
50g milk chocolate, melted
50g dark chocolate, melted
100g icing sugar
250ml double cream
1/2 tsp vanilla essence

To decorate – 4 Oreos cut in half

METHOD

1. Preheat your oven to 175 degrees fan and grease three 6 inch cake tins with either butter, or my personal recommendation (which never fails me), PME release a cake spray

2. Using a stand mixer or electric hand mixer, beat the butter and sugar until smooth and creamy

3. Beat in the eggs, until fully combined

4. Add the flour, cocoa powder and melted dark chocolate, then beat again until completely smooth

5. Divide the mixture between the three greased cake tins and make sure they are level.

6. Bake in the oven for 35-45 minutes or until a skewer comes out clean

7. Remove from the oven and leave to cool in the tin for 10 minutes before turning out on to a wire rack to cool completely.

8. Whilst the cake cools, make the icing. Beat the butter in a stand mixer or electric hand mixer until pale and fluffy, add the icing sugar, vanilla essence and double cream and beat again until smooth

9. Add in the crushed Oreos and beat again.

10. Next make the chocolate cream, add all the ingredients in to a bowl and using either a stand or electric hand mixer beat until stiff peaks are formed.

11. To assemble, spread a third of your Oreo butter cream on to the bottom cake layer, spread across evenly. Add another layer on and repeat. Do the same again for the top layer.

12. Either then pipe or spread the chocolate cream over the Oreo buttercream on the very top layer only. Then arrange the Oreo cookie halves into the chocolate cream around the top of the cake.

Tip – for even layers, using a bread knife level off each cake before spreading on the Oreo buttercream.


ENJOY! If you opt for Dreamy Oreo Cake, please do share a picture!



Lemon & White Chocolate Bundt Cake

Lemon & White Chocolate Bundt Cake

This beautiful bundt cake is surprisingly easy to make. The inspiration for this came from the discovery of the wonderful Keelham Farm Shop in Skipton, where I bought some of the most gorgeous lemons you have ever seen (yes I really did get that excited about lemons) and colourful edible flowers. However, don’t worry if you can’t find edible flowers, just grate some extra lemon zest and white chocolate over the top, it will still taste wonderful.

The cake itself is full of hidden ingredients to make it extra special and the icing is a sour cream and mascarpone base, making it not only a healthier option to buttercream but also extremely delicious!

INGREDIENTS

Bundt Cake
150g white chocolate, melted
320g salted butter
350g caster sugar
4 eggs
380g self raising flour
Zest of 1 lemon and 1.5 tbsp juice
2 heaped tbsp soured cream
2 tbsp crunchy peanut butter

Icing
150g white chocolate, melted
150ml soured cream
175g mascarpone
250g icing sugar
Zest of one lemon and 1 tsp juice

Optional to decorate – either edible flowers or lemon zest and grated white chocolate

METHOD

1. Preheat your oven to 170 degrees fan and grease your bundt tin well with either butter, or my personal recommendation (which never fails me), PME release a cake spray

2. Using a stand mixer or electric hand mixer, beat the butter, sugar and melted chocolate until smooth and creamy

3. Beat in the eggs, soured cream, peanut butter and lemon juice until fully combined

4. Add the flour and lemon zest, then beat again until completely smooth

5. Pour the mixture into the greased bundt tin, make sure it is level.

6. Bake in the oven for 50-55 minutes or until a skewer comes out clean

7. Remove from the oven and leave to cool in the tin for 10 minutes before turning out on to a wire rack to cool completely.

8. Whilst the cake cools, make the icing. Combine all the ingredients in to a stand mixer or using an electric hand mixer beat until a perfectly smooth icing is formed (this will take a few minutes).

9. Spread the icing on to the cooled cake and top with either edible flowers or grated lemon zest and grated white chocolate.


ENJOY! If you opt for Lemon & White Chocolate Bundt Cake, please do share a picture!